
I recently acquired a Roomba j9+ from iRobot. While it’s an excellent vacuum robot, I found the accompanying app lacking, especially since it requires the vacuum to be online, and the robot has a camera—an aspect I’m not particularly fond of.
To overcome these limitations, I decided to integrate my Roomba into my Home Assistant setup. However, due to a recent iRobot update, the local API no longer provides map data. This article outlines a Python script-based solution I devised for seamless integration.
Prerequisites
Before we dive into the script, there are a few essential prerequisites:
Map and Room Configuration:
- Ensure you have created the map and defined different rooms using the official iRobot app.
Dorita980 Library:
Retrieving necessary data
With the prerequisites in place, follow these steps to get the required map and room IDs:
Install dorita980
| |
Get Credentials
| |
This command will provide your BLID and password, crucial for Home Assistant integration.
Retrieve Map and Room IDs
| |
Start the job from the iRobot app, close the app from your mobile and run:
| |
Note: if you installed the HA iRobot extension before these steps: As per this comment, make sure the
Continuousoption is NOT enabled in HA integration. Don’t forget to turn it back on once you are done.
You’ll get something like:
| |
Note: If you decide to edit the map, the
user_pmapv_idwill change, so you’ll need to update it.
Install the iRobot extension
Add the officiel HA integration for iRobot (here) and log in to your robot using the credentials.
The script
Back to the main topic: the script.
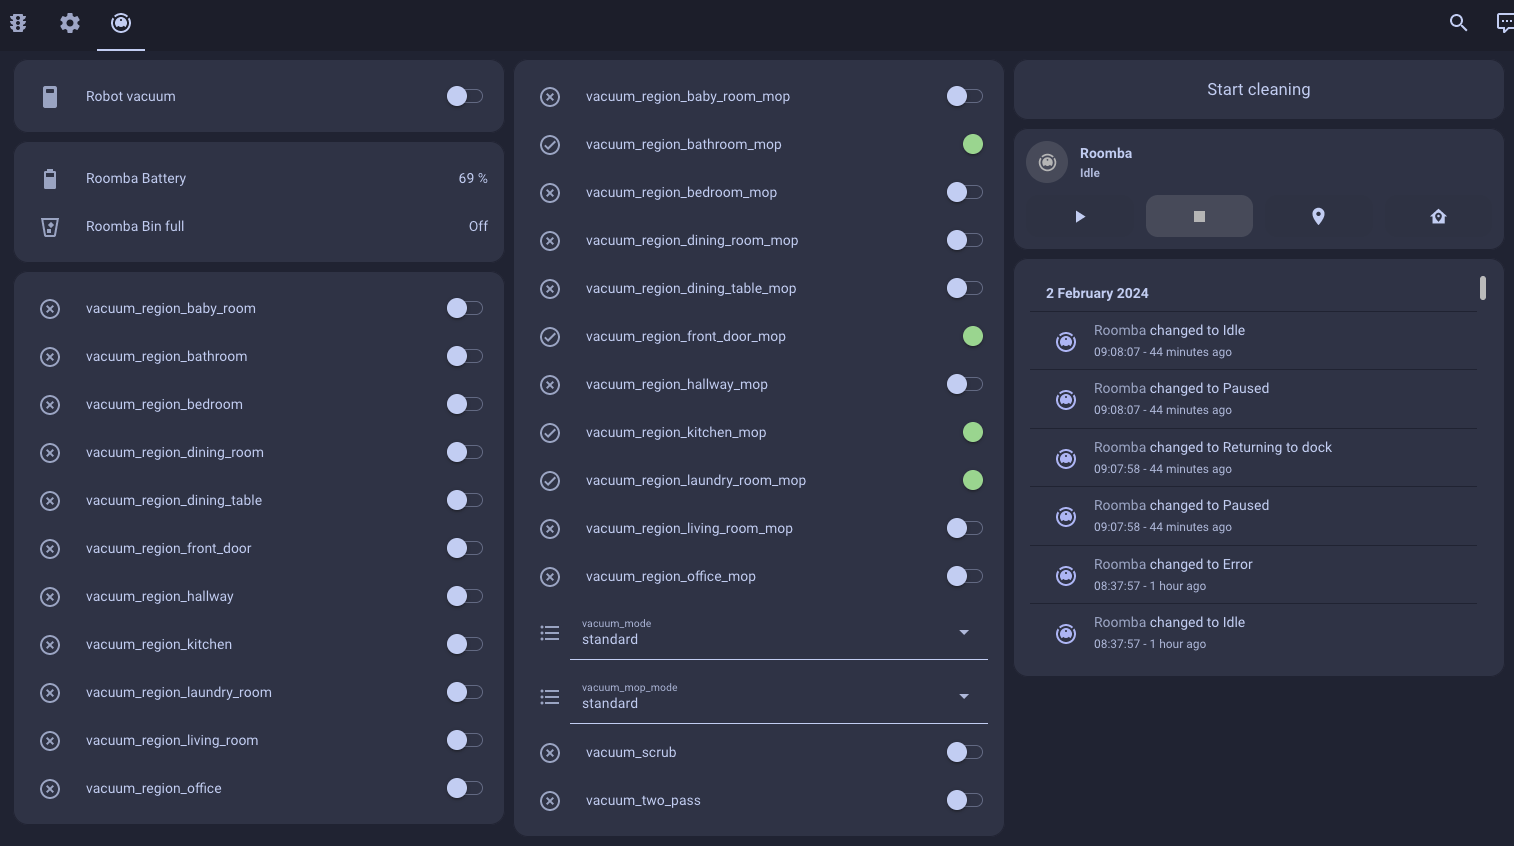
In order to have a better control from the UI, I’ve decided to create a couple of helpers:
vaccum_room_[the name of the room]this is a toggle that will trigger a job in a specific roomvaccum_room_[the name of the room]_mopthis is also a toggle, but this will tell the robot to also mop the room
We also need a couple of other helpers for the various modes and options we can set on the robot:
vacuum_mode: quiet | normal | powerful (dropdown)vacuum_mop_mode: eco | standard | ultra (dropdown)vacuum_scrub: true | false (toggle)vacuum_two_pass: true | false (toggle)
There’re a couple of other options we could set, but I don’t use them, so they are hardcoded in the script.
How to use it
Two ways of using it, you can either change the toggles, and call the script from the UI, or you can create an automation.
Now if you want to create an automation, you can use the input_boolean and input_select helpers to set everything up, and call the script when everything is ready.
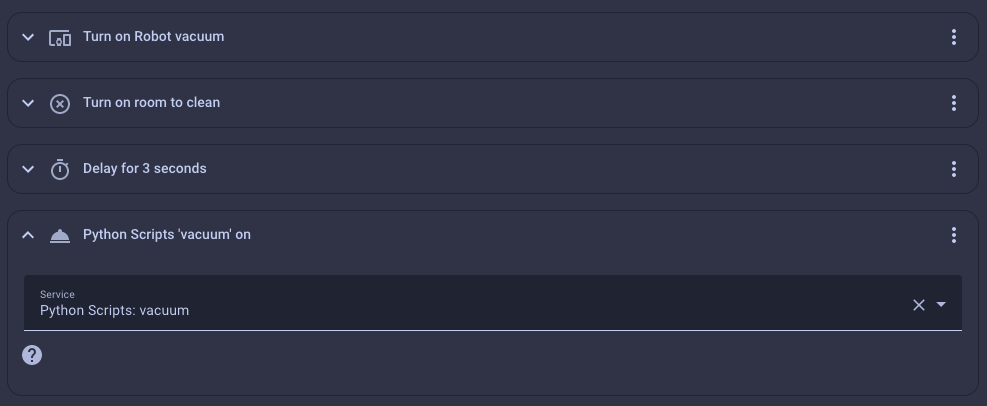
For my specific needs:
- I turn on the plug
- I change the toggles to true for the room I want to clean
- I wait for 3 seconds (just to make sure the script has time to get the new state)
- I call the script
This automation is triggered by a calendar event, so I can schedule the cleaning easily.