
If you want to jump straight to the source code, here’s the link to the github repository.
Introduction
In this tutorial, we will build a simple blogging application using Next.js and Supabase. Next.js is a popular React framework for building server-side rendered and statically generated web applications, while Supabase is an open source Firebase alternative that provides a PostgreSQL database and authentication APIs out of the box. By combining these technologies, we can easily create a performant and scalable blogging platform.
Throughout this tutorial, we will cover the following topics:
- Setting up a Next.js project and integrating Supabase for authentication.
- Creating a PostgreSQL database schema for our blog application using Supabase.
- Implementing server-side rendering and client-side routing with Next.js.
- Building a user interface for creating, editing, and deleting blog posts using React components.
- Deploying our application to the cloud using Vercel.
By the end of this tutorial, you will have a fully functional blog application that can be customized and expanded to suit your needs. So let’s get started!
Setup our project
Create a new project with next.js and typescript:
| |
Install supabase and bootstrap:
| |
Now we can initialize supabase:
| |
Which will create the supabase folder with the config, and finally, start all the services:
| |
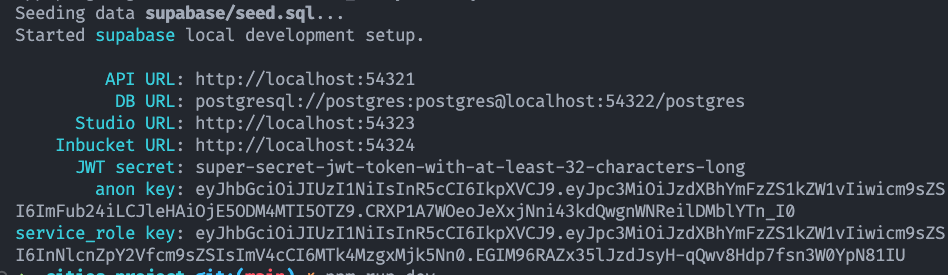
Now for the Next.js part, we need to create a .env.local file in the project root and add the following environment variables (see the screenshot below for the values):
| |
Lets start the dev server:
| |
We are good to go!
The database
We only need a posts table with the following columns:
| |
You can either create the table manually, or use the supabase dashboard.
Quick note on the
authorcolumn: we are using directly theuuidfrom theauth.userstable. Usually as a good practice I would create aprofilestable with theidas the primary key and additionnal infos (like the name, the avatar, etc…). But for this tutorial I will keep it simple.
Lets turn on RLS (Row Level Security) for the posts table, and authorise everyone to read the table, any logged in user to create posts, and finally only the owner can update:
| |
You can see (and actually create/edit) those policies in the supabase dashboard:
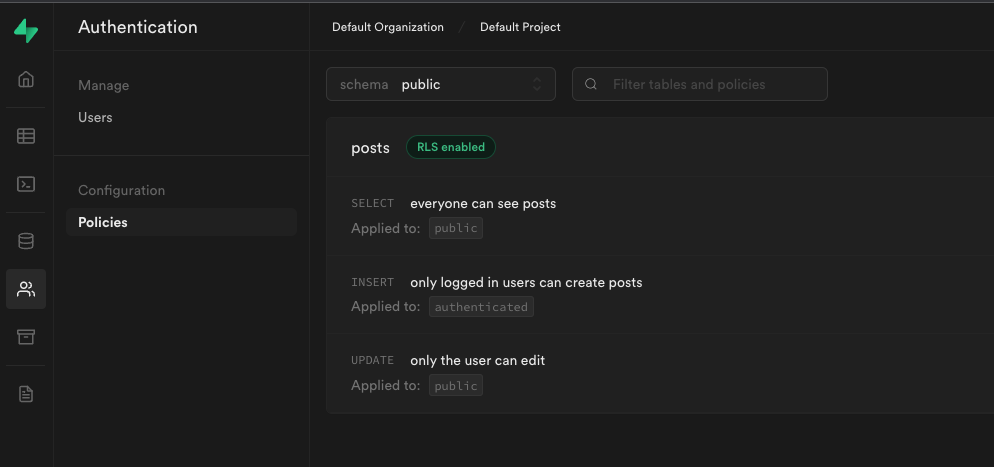
Note: no delete for now - so I’ve kept it out of the policies - but it would be the same, only owners can delete.
NextJs setup
Lets get rid of the default page in the pages folder and replace the index.tsx with the following:
| |
As a reminder, the pages folder is a special directory in a Next.js project that contains the pages of your application. When you create a new file in this folder, Next.js automatically generates a route for it based on the file name. For example, the index.js in the pages folder, it will be mapped to the root URL of your application.
For our application, we will have the following pages:
/: the home page, which will list all the posts/posts/[id]: the post detail page/posts/new: the new post page
In terms of structure, our src folder will look like the following:
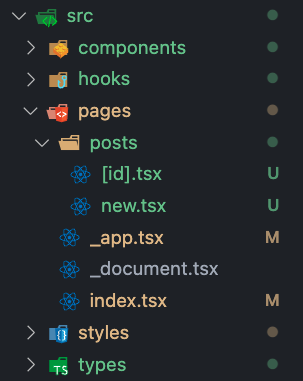
So to recap, we will have:
components: our React componentshooks: our custom hooks for getting/setting data from supabasepages: our Next.js pagesstyles: for some custom stylingtypes: for our database types
Everything is now ready, lets jump on the UI!
Next step: the UI